CREATE LOVES SAVE NOSH OBSESS EYE-CANDY

CROCHET helps relieve stress, DOGS love you unconditionally, COUPONS leave you a little extra money in your pocket and FOOD nourishes your soul...what more could you ask for?


New to JellyBeanster? Click HERE to find out just what we're all about... Don't forget to comment and leave me a link to your blog so I can visit too! Thanks for stopping by!
Showing posts with label CREATE. Show all posts

Friday, January 13, 2012

Rippletastic purse

Ever since I made my mom her hexagon purse, I have been wanting to make one for myself!  I love the festive colors that the hexagon purse used but I wanted something a bit more grown up... more sophisticated... and I wanted to have a go at using thinner yarn too.  It was perfect that I ran into this free Vanna White Patten on one of those little cardstocks they put up all over the store with free patterns.  I was instantly in love and I knew I had the PERFECT yarn stashed away at home to make it too!

I rushed home and started putting colors together.  I had 4 different colors and I only needed 3, don't ask me why but it took me forever to decide.  FINALLY I figured it out and I went stitching away!  Many many nights later, I came up with this!

LOVE the colors!! I think I made the right choice with the color combos if I say so myself :-)  The yarn is sooo soft too!! It's made by Caron and called SPA and it's an acrylic/bamboo blend.  At least the light gray and pink are.  The dark gray is also Caron SPA but it's a acrylic with merino wool blend.  They're both amazing and so easy to work with.  The bamboo blend was a bit thicket than the merino wool blend so I just made sure that I made those rows a little tighter than the dark grey ones.


Because the yarns were a bit different in thickness, I made sure I blocked the poop out of it!  I put a damp towel over it and just put the iron on top with the steam coming out.  I didn't leave it on there, I just dabbed it on/off and on/off..... I did that until the towel on top was nearly dry and it worked like a charm.

  
    The pattern included a method to fill in the ripples so i filled away!  I was going to fill it in with stripes just like the rest of the bag but hey at this point, I was just kinda lazy for all that color work and I just wanted to be done!


I found this great grey fabric with little felt circles on it in the remnant section for half off at Joanns!!  Talk about luck!  I had to make sure it wasn't stretchy though so that it would take the stress of the contents in the bag instead of the crocheted fabric.


I stitched them together by hand really quick just to hold it in place so I could sew it up with the sewing machine.  I used the bright green thread jsut to make it easier to see what thread I would have to cut out later...


I pinned the sides together and started stitching them up using the light grey yarn...


I just love all that rippley goodness!!  All that's left to do now is put a strap on it and put together a matching outfit... so fun :-)  I'll post pics of the final product when I get around to deciding whether I'm going to buy a strap or make one... what do you think??


***~Thanks for stopping by!~**

Happy Crafting!


Happy New Year

I can't believe it's 2012!  Crazy how time flies by... I feel like it was yesterday that the world was freaking out over the computers crashing bc of Y2K.... well I'm glad it didn't otherwise you wouldn't be reading this :-)

Everyone always says Happy new Year and has great parties but every new year I never feel any different.... except this one!  It really is a happy new year for me!  I finally finished my electrical engineering degree at UCF and .....wait for it.... I got a job!  It's been a huge transition to make from student to "young professional" or at least that's what they call me but I wouldn't say i'm really that professional quite yet ;-)

For the first time in a VERY long time I could sit around and do NOTHING!  And let me tell you , it was fantabulous!Well I guess we didn't really do nothing since we did road trip to New Jersey, then stayed at my parents house in Daytona Beach and then went to South FL for New years... But it was nice bc while I was at all of those different places, I didn't have to worry about school and when the next assignment was due OR about work!  It was a very much needed vacation...  One thing I did do... a whole lot of was crochet of course!  I started a bit late on the xmas presents (and yes December 25th is only a bit late in my world) but the important part was that I got them done! ok ok I'm still working on ONE but I will get it done!!


This is one of the xmas presents i actually finished!  It was a gift for the bf's sister.  I've been wanting to make her something and just couldn't figure out what color to use... well she's getting married and this was the exact color on her "save the date" magnets she sent out!  Perfect, I saw the color and fell in love with it.  It's pretty awesome what 1 skein of yarn and 1 crochet hook can do!

It needed something else though, so I made this little butterfly to hold it nicely folded while it made its way back up to New Jersey

Then I whipped up a nice cozy 100% wool scarf for the bf's momma.  The yarn is stitch nation by Debbie Stoller and it's amaaaazing!  The color is to dye for (hehe) and it was super easy to work with.  I loved the end product too!  I used Debbie Stoller's pattern "One Skein Scarf".  It was pretty chilly up in Jersey and this scarf is going to be perfect for those windy winter nights.


 When giving a gift, I feel like presentation is key... You have to make it look nice otherwise it doesn't really have the same affect, ya know?  I found some lilac ribbon and made a little bow on it to hold the scarf nicely folded during transit.  Put them side by size and wrapped them up in tissue paper...

and off they went!


***~Thanks for stopping by!~**

Happy Crafting!


Wednesday, November 30, 2011

Sewn Dog Bed with bumpers

My dog Shelby LOVES to sleep with her back against something.  When I first got her 2 years ago, I knew I wanted to make her bed since all the dogs beds I saw were like $40 for a comfy one!  $40 is a bit much so off to Joann Fabrics I went to find some soft fabric.  I picked out this brown one with pink, green, and orange polka dots.  I think it suits her well :-)

The bed was my first sewing project so I wasn't 100% sure what i was doing I just kinda figured it out on the way.  1 old pillow, some stuffing, and 2 hours later, I had this bed!  The only problem was that the sides wouldn't stay up!! I had put in too many panels and so they drooped.  To fix this, I made this cardboard bed frame lol... it looked so ghetto!! But it did the job holding the side bumpers up!


Tonight, finally after TWO YEARS in the making, I have fixed it! It only took about 15 minutes too lol... I dunno why I put it off for so long.  Now the bed can stand up on its own and I don't need to have that ugly cardboard box in my room anymore!


The best part is that Shelby seems to really like it :-)

Crochet Mario Blanket Part 3- Yoshi

If you have ever attempted to crochet a cartoon with any stich other than Tunisian Simple Stitch (TSS), then you know just how annoying it can be to change colors!!

After much debate, I decided to continue my Mario Blanket in TSS.  I haven't decided if I'm going to use all of the characters I have already made even though they're in different stitches or if I'm going to scrap the 2 mushrooms and piranha plant and redo them in TSS.... we'll see!!  Maybe I can just use the mushrooms and piranha for some pillows instead?  I dunno... i gotta sleep on it..

Anywho, I finished Yoshi!!  I was super motivated so it only took me like 3 nights to do it, 2.5 hours at a time so around 7.5 hours GEEZ!!  I was also watching TV aaaannnnd I must have checked the stitch chart like a million times before each row just to make sure I didn't fudge anything up.


What do you think?! I was so excited to finish! But now that I've stared at it for a while, there are definitely some things I would change if I had to do it again.  For all of the Mario projects, I took a really small pixelated picture and made a small stitch chart on graph paper (each box = 1 stitch)  Then to make it bigger, I just made 1 box = 4 boxes (2x2) and that kept it proportional and made the picture bigger.  BUT the downfall is that it looks terribly pixelated when you blow it up like that!! I should have definitely "smoothed" the edges out a bit instead of doing the black outline so abruptly.  It does look pretty good from far away though and I think  it definitely preserves the true age of the mario nintendo game!  Remember back in the day when the characters were actually this pixelated??

Here's a close-up:


And an even closer close-up: (Please ignore my shoe holding it flat in the top left corner :-)

I used Vanna's Choice yarn for all the colors except the outside gray.  For the gray, I used Caron Simply Soft just because I had like 5 skeins to burn through!  Even though the Vanna's Choice and the Caron are both classified as Worsted weight, they're not exactly the same weight.  Vanna's Choice is definitely a bit fluffier and so the stitches that make up Yoshi came out a little bigger than the gray ones.  The only thing this really affects is that it makes my work curl up a bit more than TSS normally does but that's nothing a good blocking won't fix!! Before I put everything together, I will be sure to block the crap out of it!

Sometime in the next week, I'm going to put up a new little tab on my home page with all the posts for this blanket and stitch charts so that you can make it too if you want!  I would love L.O.V.E to see fellow yoshis and mushrooms that are roaming cyberspace out there!!

Next on my list is Bob-Omb and the Goombas!!


Edit:
I FINALLY finished the stitch chart for Yoshi!  Enjoy and please post whatever you make on here, I would love to see :-)
In my project above, I made each sqaure in the stitch in the chart below actually equal to 4 stitches (2 stitches tall by 2 stitches wide).  This just made the yoshi bigger in size but still proportional.  Beware though that by doing this, I simply made each "pixel" larger which is why my yoshi looks so pixelated.  You should "smooth out" some of the edges once you make your chart larger which is what i should have done... oh well.  This is why this will most likely end up as a pillow and not as part of my final blanket.  Happy stitching!

Yoshi Pixel Picture
Colors:
- red
-light green
- dark green
- white (the x is supposed to be a white stitch)
- black
- background color (empty square, I used grey for my yoshi)


Sunday, November 27, 2011

Yummy T-shirt yarn crochet rugs!

Didn't I say I was OBSESSed?  I L.O.V.E the simplicity, the reusability, the versatility of these rugs!  They brighten up a room like none other!  And like I said before, the doggies love this!

I call this one Sorbet :-)


This is the first one I ever made!!  As you can tell over on the right, this was BEFORE i figured out that to make crochet rugs, you should always keep crocheting in a spiral instead of joining and chaining for the next rows... live and learn!! This one's going in my office :-)


Here is the trio of my creations.  Now that's what I call a colorful eye orgasm :-)

The trio!!
Let's see how long I can last before starting another one!! AHA the count begins...


P.S.  Can you tell I bought a real camera and stopped using my phone?? :-D

Friday, November 25, 2011

Crochet Recycled T-shirt yarn Rug

Strip it up!
 I have had these great cotton t-shirts sitting around for the last 5 months!  I always said I was going to do something incredibly crafty with it but never really found any motivation... FOUND IT!!

Everytime I'm cooking or crafting or doing ANYTHING for that matter, my dogs always want to sit right at my feet.  It's cute yes but I always end up tripping over them and stubbing my toe or just completely falling on my face... not good!  I began to notice that they LOVE to sit on rugs though so I said I will make a rug for my craft room!!  That way I can put the rug on the other side of the room and they will lay there, only there and can no longer accidentally sit on my sewing pedal and scare the crap out of me (yes, it's happened)

I  made sure to keep track as I went just in case someone else wants to try this! I started by cutting the shirts in strips.  I used almost EVERYTHING even the neck part with the seams on it and stuff, it all gets put together and you can't even tell!  After you cut the strips, be sure to pull them so that they curl up!
The remnants of the 4 t-shirts

More strips all curled up!
Bottom seam of the shirt.  Cut in half and unfold the bottom (right in the pic) half.


I started crocheting like normal except I had a size Q hook (15.75 mm HUGE!!).  I used BACK LOOP SC the whole way around!  I love the way the ridge forms when sc goes in the back loop only!  I wanted to change colors for each round so I just went about my merry way.  To start, I ch 2 then sc in first ch (center of circle made).  Then I sc 8 into the center.  2nd round I did 2 sc  (inc) in each sc.  3rd round I did 2sc in every other sc (sc, inc).  4th round I did 2sc in every 2 sc (sc, sc, inc) and so on and so forth. 

Rounds 1-5

Round 1-8


Shelby loved it!


I will definitely be making more of these!! This is my new OBSESS!!

Friday, November 18, 2011

Queen Anne Lace Scarf


I don't really know who Queen Anne is but she must have been a really popular lady!!  This scarf is a super easy project and it stitches up beautifully!

I used Caron "Country" yarn (merino/acrylic blend) and it feels so nice and warm on my neck, I just love it!  I got lots of lovely compliments from buddies at work so that definitely made my day!! :-)

I got the super simple pattern from Ravelry... while you're there be sure to check out the hundreds of other Queen Anne scarves, they're simply wonderful!! SO many colors and the beauty of this scarf is that no matter what material yarn you use, it will still look stunning!!


I will be stitching up a few more of these for Xmas time... maybe some lucky work buddies will get one for their secret santa present :-)


I think I'm a bit obsessed with scarves right now especially being that winter's coming up and quick!! I feel like everyday I step outside, it gets just a little bit cooler... and I love it!!  It really just gives me an excuse to stitch up more gorgeous projects...

Right now, I'm finishing up a little something for a little baby in my life!  I'll post it when I'm done and after I model it on his little baby head

Hope you had a wonderful day!! Think warm thoughts!


Celtic Knot Beanie for the bf

Hello!! Thanks for stopping by!!

I finally finished the super secret project I was working on for the bf... whaddaya think?
I've always wanted to crochet him something but could never find anything that was "manly" enough... I always saw patterns that he said were cool but wouldn't actually wear.... *sigh*

I was looking through Debbie Stoller's "Son of Stitch N' Bitch" and saw this awesome design for a hat:


But it was a knitting pattern!! BAAAH!  It's times like these that make me so jealous of knitters! There's so many more knitting patterns and books out there than crochet.... oh well!!

This only made it a bit more of a challenge.... NO, I didn't learn how to knit to do this pattern but instead I converted it into a Tunisian Crochet project :-)
I made it from a bunch of wedges starting from the top center of the hat to the rim.  Then I stitched up the sides and voila!!


For the yarn, I used all Vanna's Choice in colors: White (don't remember the label name for white) and "Charcoal Print"

At the rim of the hat, I went around and did 1 round of front post single crochet and then another round of normal single crochet, this pulled it all together and gave it a nice rim.

I love love L.O.V.E this hat!! As soon as I finished it, the bf said "Awesome, this is perfect"  What better words could a mad crocheter hear after finishing a masterpiece!!  I love that he loves it so much but I'm thinking I might just have to make another one in pink for me!!! How cute would that beee?!??!

tempting, very tempting.... but I have so many other projects flowing through my head that I think I will do those before repeating a pattern :-)

I have oodles of other projects to share I just haven't gotten a chance to post them... Also I realized that I really hate the quality of my pictures on this blog! GAH!! I always take them with my phone and well they just don't come out so good :-/

This black friday I will make it my mission to find a sweet camera so i can take some better pics... until then, you're stuck with pics like these


MORE Joann Coupons!! Better ones :-)

Have them sent to your IPhone or Android phone instead of printing paper, GO GREEN!!

Thursday, November 17, 2011

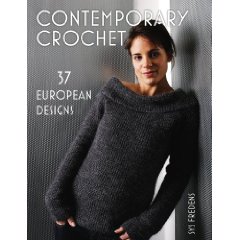
Free Shipping at Joann Fabrics = New Crochet Book!

AWESOME! Joann has ONE DAY of free shipping on EVERYTHING!!  Only today Nov 17th though...


They have amazing books, yarn, crochet & knitting supplies but by far my favorite are the BOOKS!!  Michael's does NOT EVER discount books so whenever there's a coupon for Joann's I go straight there to get my crochet books!  Paying full price for those gets expensive quick as I'm sure many of you out there know...

AND Books are 30% off right now!! waaaahoooooooooooooo!!

Joann's has a HUGE variety of books MANY of which are ONLY available online so I went ahead and snagged this one for about $15 shipped :-)